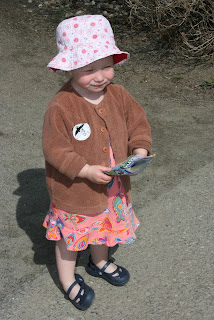
Easter weekend came and went in a whip of egg yolk and candy and food coloring. I had to work all day Saturday, so I was disappointed to miss the kids scramble for eggs during the annual egg hunt on the town green. Grandma and Hapa were here to watch the madness, though, and as everyone pointed out later, the "hunt" takes all of 2 minutes to completion. I always feel very sorry for the one or two kids who inevitably run over to the green at 2 minutes past 9:30, only to find there's not a single egg left kicking around anywhere on the grass. Aiden and Haley got their share of eggs filled with candy and trinkets, and then went home to color the real thing later that afternoon. As usual, fingers were dyed darker than any of the eggs but everyone had fun creating one-of-a-kind masterpieces.
 |
| Viewing their loot with Grandma |
 |
| The Easter Bunny brought Haley fairy wings |
 |
| Hop hop hop! |
Aiden's tye dye experiment led to doing most of the eggs that way
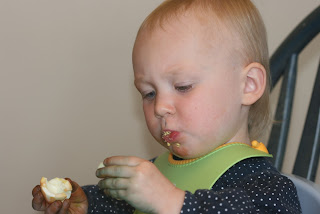
We had a nice Easter ham for dinner and ate lots of hard-boiled and deviled eggs. Aiden tried the yolk for the first time and declared it "delicious" ... but then hasn't built up the nerve to try another one since. Haley snarfs it all down, yolk and white - she's a protein fiend, while Aiden is our fruit (& veggie) bat. Both of them love Easter candy (including Peeps) though...go figure.
 |
Eating his first yolk EVER.
|
After the kids went to bed, my mom and I had our own experimental egg fun, trying to make Ukranian decorated eggs, or pysanky. I had bought mom a kit for her birthday, since the designs on the cover reminded me of the doodles she sometimes makes on paper while she's talking on the phone. I secretly wanted to try it myself too, and I figured we'd most likely end up working on it together sometime in either VT or here in NH. The intricate designs on pysanky eggs are created by applying fine lines of wax using a tool called a kitska, which you have to hold over a flame to melt the wax inside it. After most of the initial design is drawn in wax, the egg is dyed in a light color. More wax is applied to any parts of the design you want to stay that light color, and then the egg is dyed in a bit darker color. Wax is added again, and the egg is dyed in progressively darker colors each time, until you reach whatever final background color you want. When it's done, the egg is heated in the oven until you can rub off all the melted wax, and voila! It's all harder than it looks, since the tool is testy and spurts out large blobs of wax erratically, and it's rough to keep any sort of straight line going. My design was a quartet of bees, with flowers around the sides of the egg, and Mom's was a more abstract pattern. I thought they both came out well for a first try but we'll have to try it again sometime now that we know what we're doing!
 |
| My pysanky....I didn't have a photo of mom's! |


